
The 3 Stages of Graded Motor Imagery

We’ve all heard of mirror box therapy, but do you know the details of how it works? There’s actually 3 stages involved that exercise the brain and take advantage of its plasticity. There is a great deal of evidence supporting these three stages and you can use them with confidence. It should be noted that all 3 stages must be used in sequence to be effective.
Stage 1: Laterality
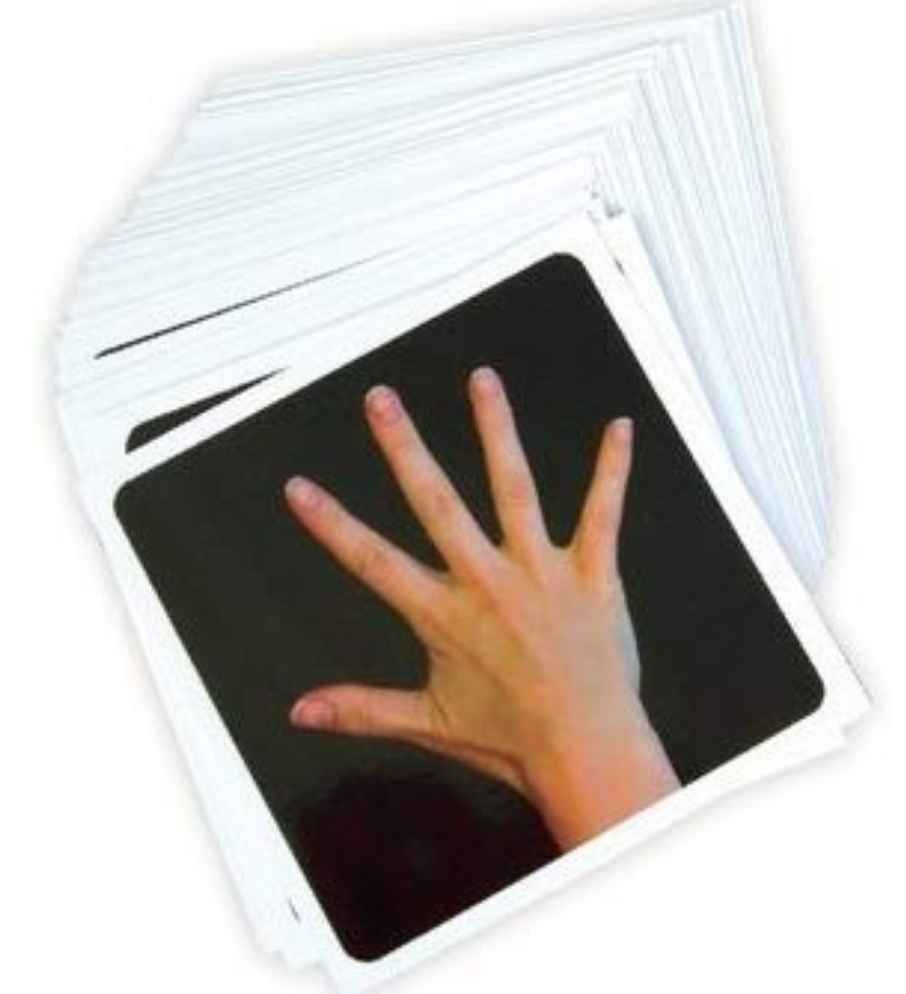
Laterality is the ability to identify if a body part as being left or right sided when shown an image of the body part. For example if a patient is experiencing pain in their hand, you would show them pictures of hands and have them identify if the hand shown is a left hand or a right hand. This is important for recovery from pain and improved mind-body awareness. Limb laterality recognition activates premotor (association) cortices, not the primary motor cortex. This is a precursor to the other two steps and prepares the brain for further association processes.

Images of left and right hands can be presented to the patient on flashcards, online, or through free Apps on your phone (orientate). The more the better.
Stage 2: Explicit Motor Imagery
This stage involves imagining movements without actually moving. Much like an athlete envisioning the movements before they do them, your patient will imagine movements of the affected hand without moving it. This activity activates the premotor cortex as well as the motor cortex, allowing the basis for graded motor imagery progression. Mirror neurons in the brain are a clear target during this activity. For example you might ask your patient to imagine their hand doing a specific activity or to imagine manipulating a certain object. Visualization of motor movements without pain improves the body’s ability to move in the same pattern without perceived pain.
Stage 3: Mirror Therapy
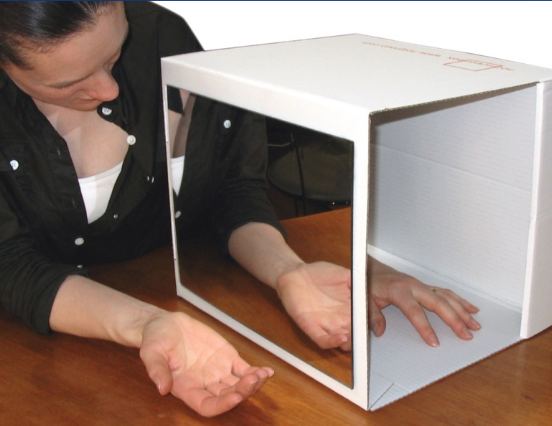
The final stage is to use a mirror to present the reverse image of a limb to the brain, thus “tricking” the brain. Some common mirror progressions may include:
- Looking at the hand
- Turning the hand up and down via the arm
- Flatten the hand
- Move individual fingers
- Thumb to fingers
- Tapping fingers
- Tool usage
A lot of research has been done to show the effectiveness of graded motor imagery on CRPS. You may also find this technique to be useful for stroke patients, phantom limb pain, and other neurologically based phenomena.
You can check out our video “How to Make a Mirror Box” for details on making a low cost mirror box for your clinic.
More To Read

Arthrodesis vs Arthroplasty in Thumb CMC OA
Piacenza A, Vittonetto D, Rossello MI, Testa M. Arthrodesis Versus Arthroplasty in Thumb Carpometacarpal Osteoarthritis: Impact on Maximal Voluntary Force, Endurance, and Accuracy of Pinch. J Hand Surg Am. 2021 May 24:S0363-5023(21)00199-4. doi: 10.1016/j.jhsa.2021.03.023. Epub ahead of print. PMID: 34045112. The Skinny: This was a retrospective study based on a convenience sample of individuals who…

Does Obesity or Smoking change the outcomes for Distal Radius Fractures
Hall, Matthew J., Ostergaard, P., Dowlatshahi, A., Harper, C., Earp, B. Rozental, T. (2019). The Impact of Obesity and Smoking on Outcomes After Volar Plate Fixation of Distal Radius Fractures. The Journal of Hand Surgery. In Press, Corrected Proof, Available online 31 October 2019. Doi: https://doi.org/10.1016/j.jhsa.2019.08.017 The Skinny- Distal radius fractures are one of the…

Rotator Cuff Pain: K Tape + Rehab Short-Term Effects
Nguyen, T. N. A., Nguyen, N. H., Vu, D. K., & Cu, L. T. N. (2025). Short-term effects ofKinesiotaping combined with a rehabilitation program for rotator cuff-related shoulder pain: Arandomized, assessor-blinded clinical trial. Journal of Manual & Manipulative Therapy, 33(2),112–121. https://doi.org/10.1080/10669817.2024.2387913 The Skinny:The term rotator cuff related shoulder pain (RCRSP) encompasses a range of disordersassociated…

Discovering Connections Between Trigger Finger and Dupuytren’s
Discovering Connections Between Trigger Finger and Dupuytren’s By: Tayer Roost Reference: Yang, Gehring, M., Bou Zein Eddine, S., & Hettinger, P. (2019). Association between stenosing tenosynovitis and dupuytren’s contracture in the hand. Plastic and reconstructive surgery. Global open, 7(1), e2088–e2088. https://doi.org/10.1097/GOX.0000000000002088 The Skinny: This retrospective chart review discussed the possibility of a correlation between stenosing…

Sign-up to Get Updates Straight to Your Inbox!
Sign up with us and we will send you regular blog posts on everything hand therapy, notices every time we upload new videos and tutorials, along with handout, protocols, and other useful information.